I bought two sweet little white Bibles for my nieces this Easter and I thought it would be fun if they had a small, pretty bag to carry them in. So I created these easy to carry cinch sacks. They will be easy to customize with these little hair bows found because I don't know what color their Easter dresses will be, yet! It was super easy to create; it took about 2 DVR'd Grey's to work up... Or about 90 minutes if that's how you measure time.
The supplies:
* about 1/4 ball of yarn
*J crochet hook
*embroidery needle to sew in ends
*stitch marker to keep track of rounds
*at least 3 feet of ribbon
*beads to secure ribbons (optional)
This is my very first attempt at an original pattern, so be kind :)
Abbreviations Used:
ch --- chain
Rnd(s) --- round(s)
sc --- single crochet
st/sts --- stitch/stitches
dc --- double crochet
slp st --- slip stitch
ch --- chain
Rnd(s) --- round(s)
sc --- single crochet
st/sts --- stitch/stitches
dc --- double crochet
slp st --- slip stitch
Part 1: Bottom of the bag
(I used 2 strands to make it a bit sturdier. I HIGHLY recommend it.)
Ch 16
Rnd 1-10:16 sc
Rnd 11: sc all the way around adding an extra sc at each corner (to create a slight rounding.)
Part 2: Body of the bag
(For the body I used a single strand, to create a softer, slouchy look.)
Rnd 12: sc around perimeter using only top stitch (see below)
Rnd 13: dc around, ch 1
Rnd 14: sc around
Rnd 15: dc around, ch 1
Rnd16: sc around
Rnd 17: dc around, ch 1
Rnd 18: sc around
Rnd 19: dc around, ch 1
Rnd 21: sc around
Rnd 22: dc around, ch 1
Rnd 23: sc around, ch 1
Rnd 24: (decorative shell edge) *5dc, skip 1 st, slp st in next, skip one st* repeat all the way around
Part 3: The drawstrings.
*Cut two lengths of ribbon about 18" or so.
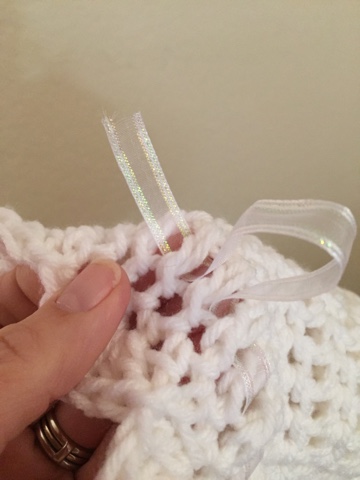
*Weave one length of ribbon entirely around the bag, through the last dc Rnd. Add a bead to the ribbons and then tie the ends of ribbon together.
* Run the second length of ribbon the same way, except start on the opposite side as the first length of ribbon; add the bead and tie the ends together.
* Trim the ribbon ends if necessary so that they are even.
* Run the second length of ribbon the same way, except start on the opposite side as the first length of ribbon; add the bead and tie the ends together.
* Trim the ribbon ends if necessary so that they are even.
Ta-da!
If you like this craft tutorial please let me know in the comments. Happy Easter!


No comments:
Post a Comment